How to migrate a virtual machine from Hyper-v to Proxmox
Categories
Popular Posts
Instructions for Migrating a VM from Hyper-V to Proxmox
1. Preparation Before Migration
Before starting the migration of a virtual machine from Hyper-V to Proxmox, you need to update initramfs to ensure proper system boot in the new environment. This is especially important if the virtual hardware in Proxmox differs from the original.
For CentOS and other Red Hat-based distributions:
dracut --force --verbose --no-hostonlyFor Debian and Ubuntu:
sudo update-initramfs -u -k all2. Copying the Virtual Machine Disk
- Stop the virtual machine on the Hyper-V server (although this is not mandatory).
- Copy the virtual machine disk in .vhdx format from the Hyper-V server to the Proxmox server.
3. Preparing the Virtual Machine in Proxmox
- In the Proxmox interface, create a new empty virtual machine.
- At the disk selection stage, delete the disk so that the virtual machine remains without one.
4. Importing the Disk into Proxmox
After the copying is complete, perform the disk import using the following command:
qm importdisk 104 /home/server23.vhdx local-zfswhere 104 is the ID of your newly created virtual machine, and local-zfs is the name of the storage in Proxmox.
If an error occurs during the import process:
qemu-img: Could not open 'proxy.vhdx': VHDX image file 'proxy.vhdx' opened read-only, but contains a log that needs to be replayed To replay the log, run: qemu-img check -r all 'proxy.vhdx'You need to run the following command to recover:
qemu-img check -r all proxy.vhdxAfter running this command, repeat the import process.
5. Configuring the Disk in Proxmox
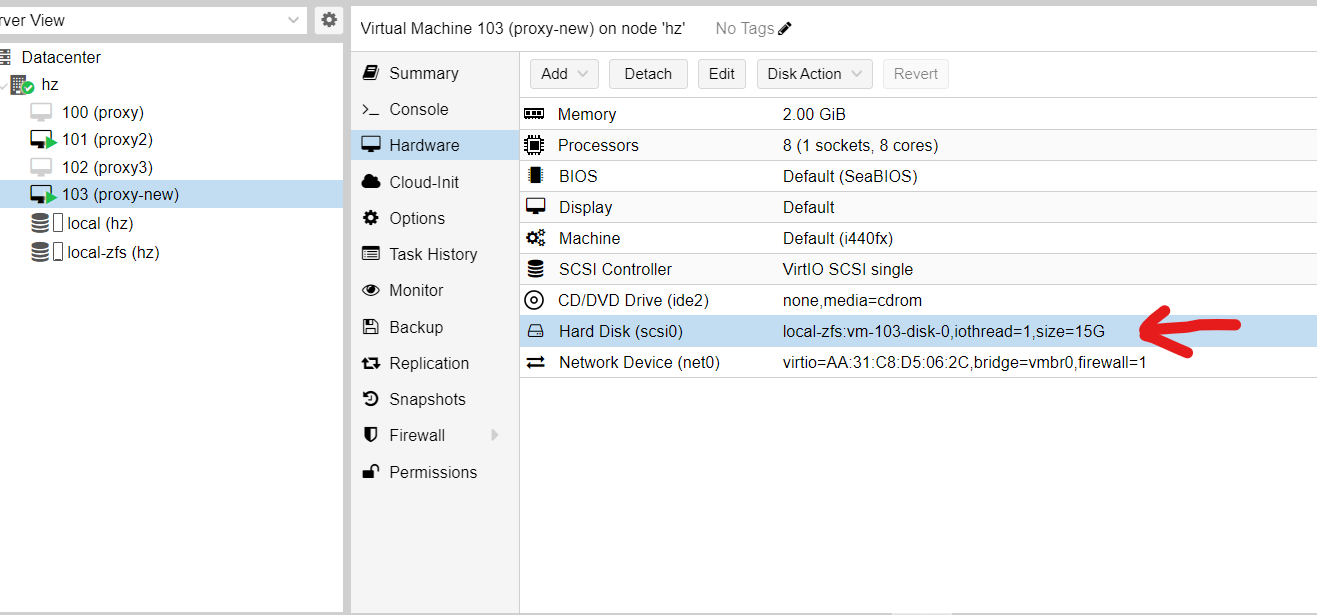
- After a successful import, log in to the Proxmox interface, open the VM menu, and go to the "Hardware" section.
- Add the imported disk to the virtual machine.
- In the virtual machine settings, set this disk as bootable.
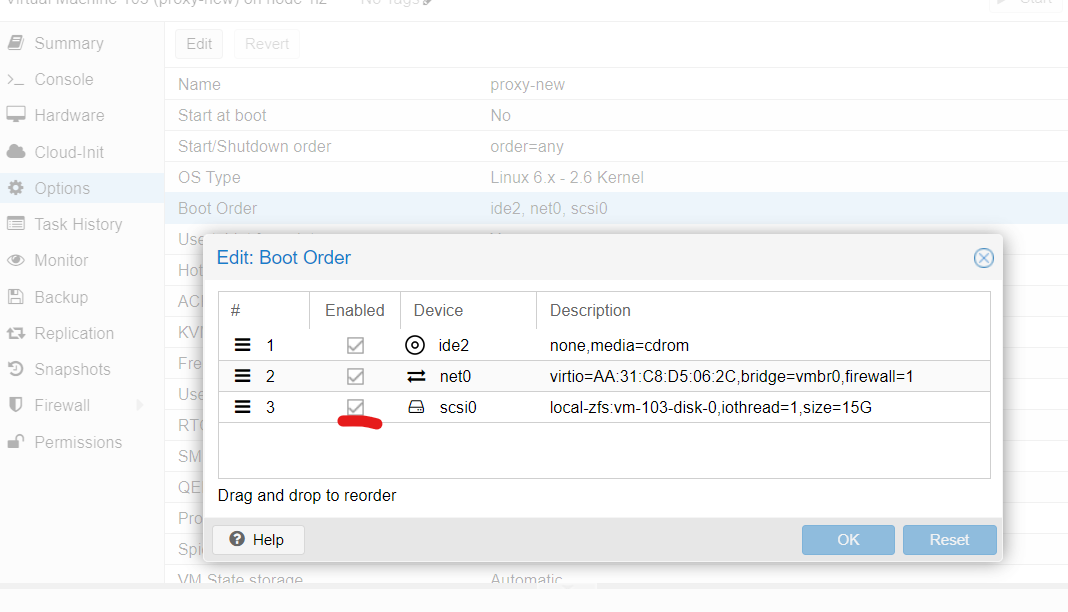
Now your virtual machine is ready to boot in Proxmox.
Our specialists at Hmara.io can easily migrate your entire VPS from any provider, ensuring a complete and seamless import.